Overview
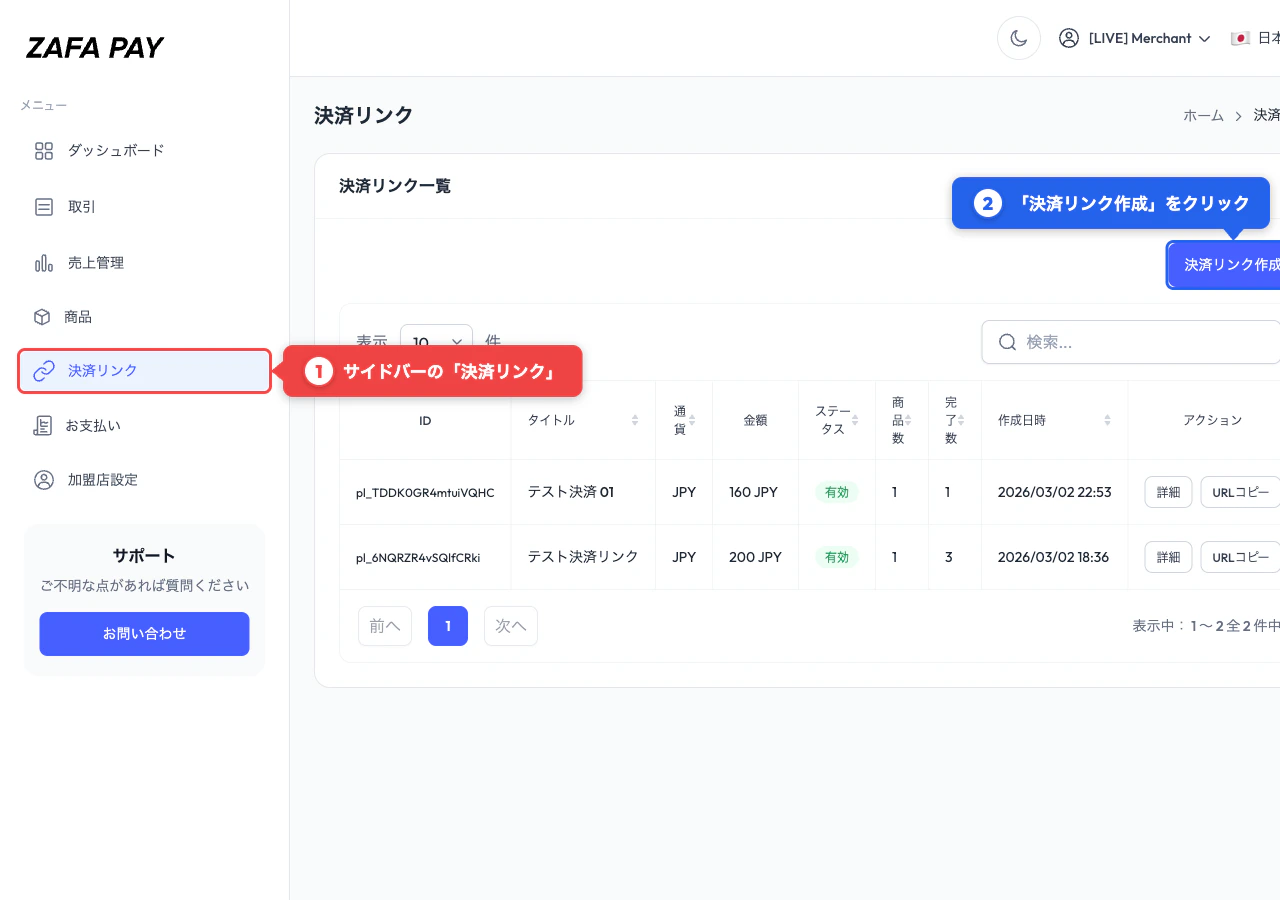
Payment Links let you accept payments by sharing a URL or QR code with your customers. Create a link from the merchant dashboard, configure your products and settings, then share it via email, messaging apps, or print it as a QR code. No API integration is required — everything is managed through the dashboard.To use existing products in your payment links, create your products and prices first.
You can also create payment links with custom line items without registering products.
Creating a Payment Link
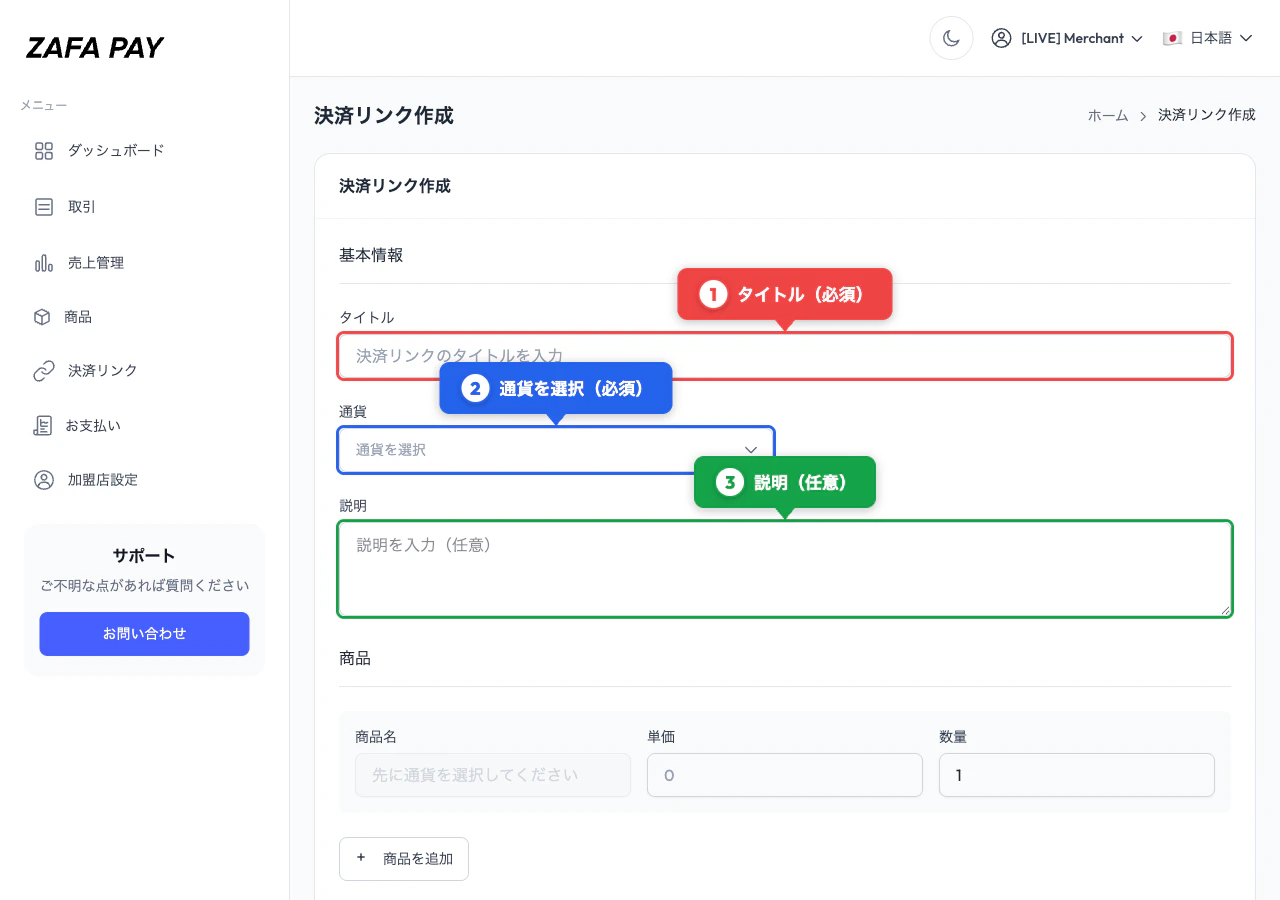
Add Line Items
Add up to 20 line items. For each item, you can either: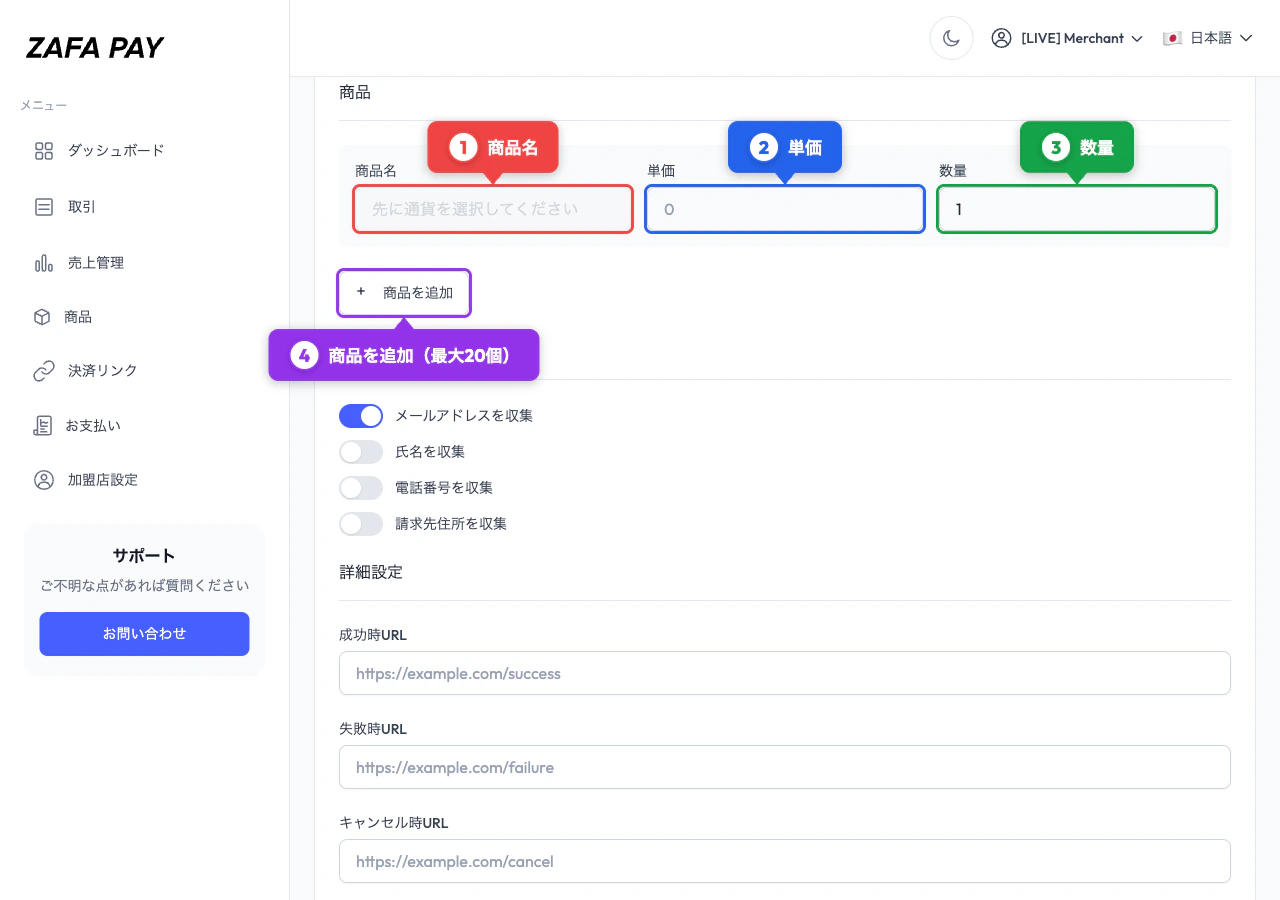
- Select an existing product — name and price are filled automatically
- Enter a custom item — specify a name and unit amount manually
Configure Options
Set customer information collection, redirect URLs, and other options (see below).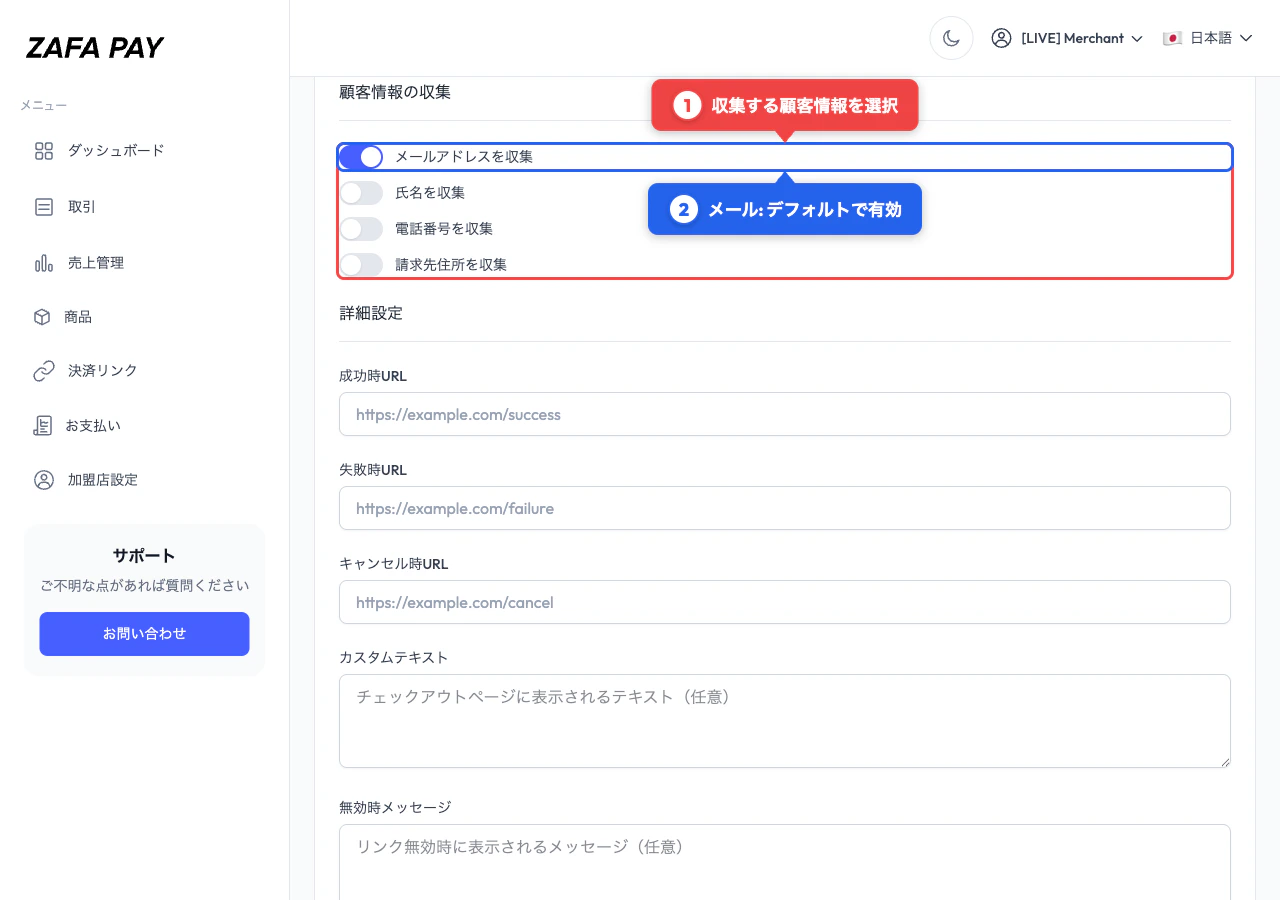

Settings
Customer Information Collection
Choose which fields to collect from the customer at checkout:| Field | Default |
|---|---|
| Enabled | |
| Name | Disabled |
| Phone | Disabled |
| Billing Address | Disabled |
Advanced Settings
| Setting | Description |
|---|---|
| Success URL | Redirect URL after successful payment |
| Cancel URL | Redirect URL if the customer cancels |
| Custom Text | Additional text displayed on the checkout page |
| Inactive Message | Message shown when the link is deactivated |
| Receipt Message | Custom message included in the customer receipt email |
| Max Completions | Limit the number of times this link can be used (empty = unlimited) |
| Expires At | Set an expiration date and time |
Sharing
After creating a link, you can share it in two ways from the detail page:- Copy URL — Copy the payment link URL to your clipboard
- QR Code — Download as PNG or SVG for printing or embedding
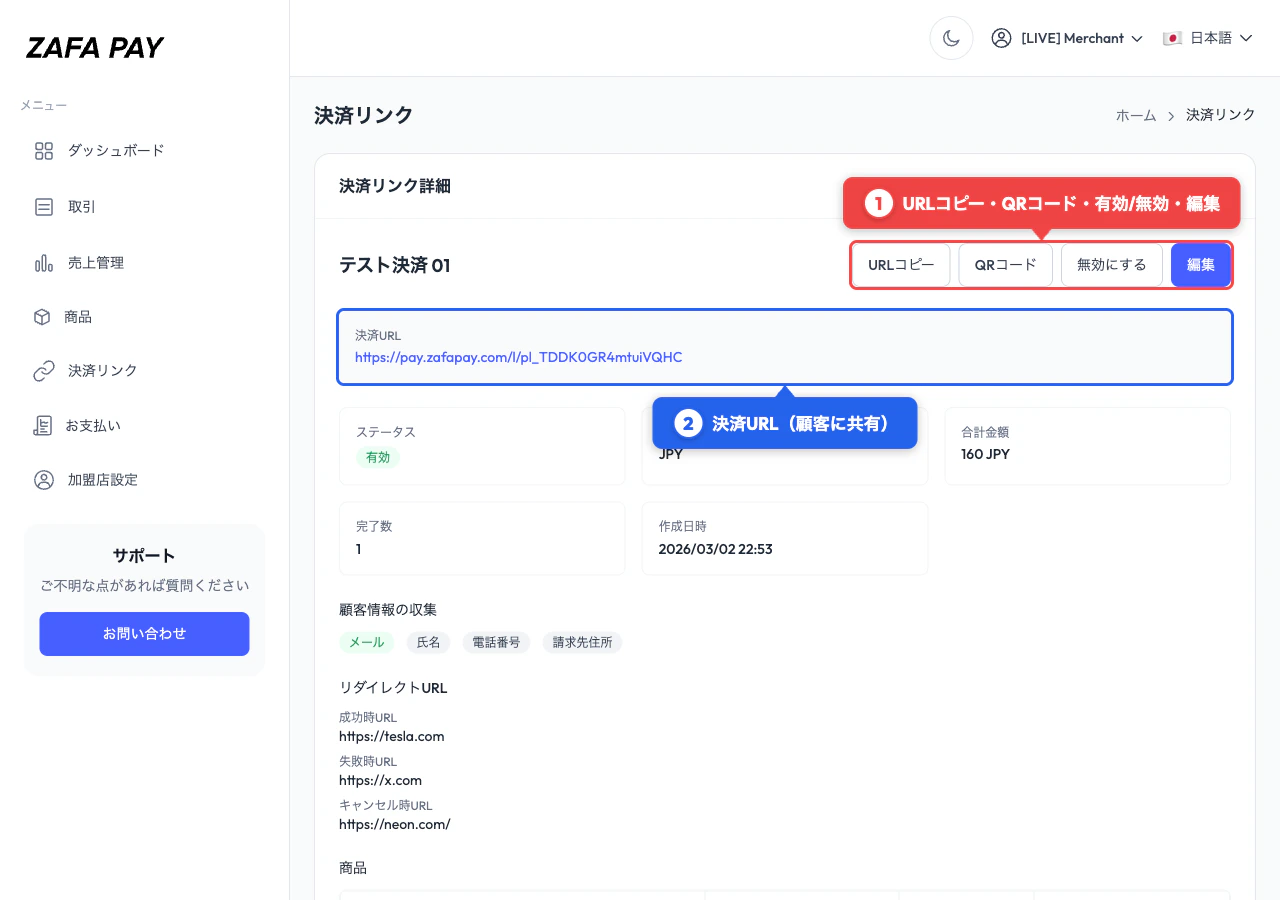
https://pay.zafapay.com/l/{link_id}
Managing Payment Links
Editing
From the detail page, click Edit to modify the link. The following fields can be updated:- Title, description
- Customer information collection settings
- Success / Cancel URLs
- Custom text, inactive message
- Max completions, expiration date
- Line item quantities
Activating / Deactivating
Toggle the link status between Active and Inactive from the detail page.- Active — Customers can access the checkout page and make payments
- Inactive — Customers see the inactive message instead of the checkout form
Supported Currencies
| Currency | Code |
|---|---|
| US Dollar | USD |
| Japanese Yen | JPY |
| Euro | EUR |
| Singapore Dollar | SGD |
| Philippine Peso | PHP |
| British Pound | GBP |
| Australian Dollar | AUD |
| Canadian Dollar | CAD |
Customizing the Checkout Page
You can brand the checkout page with your logo and brand color. These settings apply to all payment links and hosted checkouts. Go to Settings in the sidebar menu to configure:| Setting | Effect |
|---|---|
| Logo | Displayed in the checkout page header. Supports PNG, JPG, WebP |
| Brand Color | Applied to the Pay button on the checkout page (hex format, e.g. #FF6600) |
Customer Receipt Email
You can automatically send a payment receipt email to customers after a successful payment. To enable this feature, go to the Settings page in your merchant dashboard and turn on Send receipt to customer. Once enabled, a receipt will be sent to the customer’s email address for all payments, including those made via payment links.To send customer receipt emails, the customer’s email address must be collected at checkout. Email collection is enabled by default.